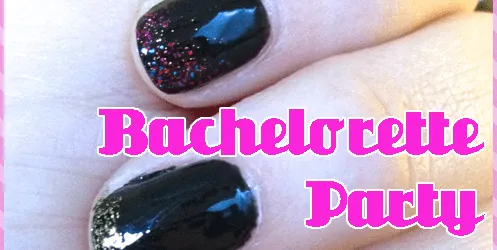
Nail Art: Bachelorette Party Design!
I mentioned
that I was in Atlantic City for my friend’s bachelorette party! I also said that I did a fun nail design that was pretty perfect for the occasion, and that I’d share it this week! Well, here we are! Hope you like it as much as I do.
Materials:
-
Clear base and top coats (not pictured)
-
Black glossy nail polish
-
Pink clear-glitter nail polish
-
Pink solid-sparkly nail polish (You’ll see the difference below!)
-
Gold clear-glitter nail polish
Instructions:
- After cleaning your nails, do a quick clear base coat on your nails.
-
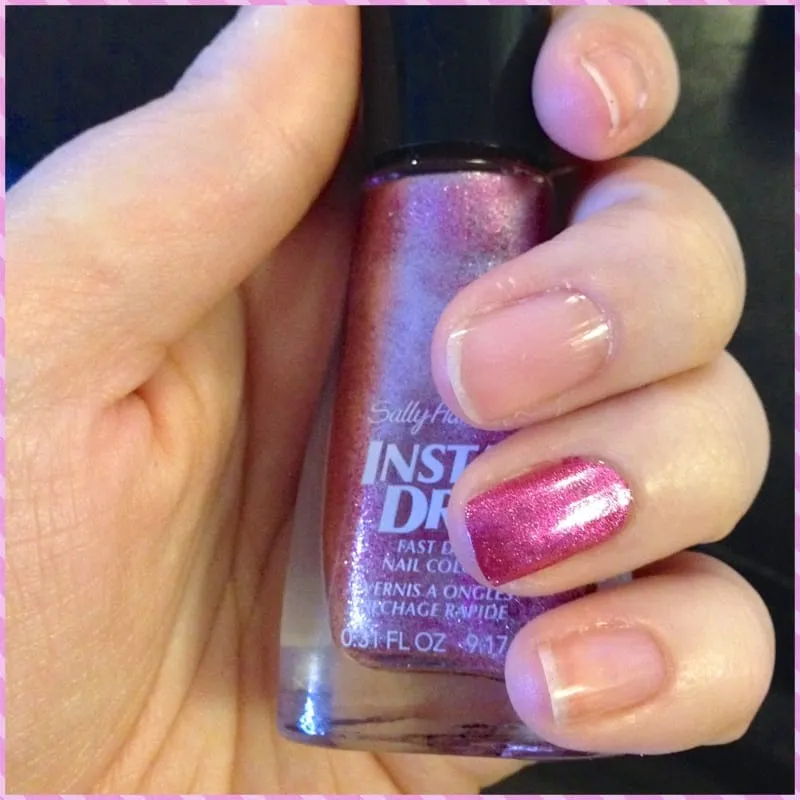
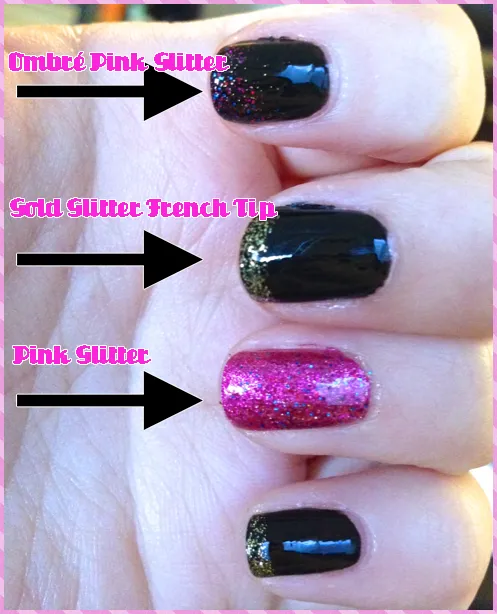
When the clear is dry, paint your ring fingers with one coat of the pink solid-sparkly nail polish. I used
Sally Hansen Insta-Dri in Pink Fast
. When it’s dry, do a second coat.
-
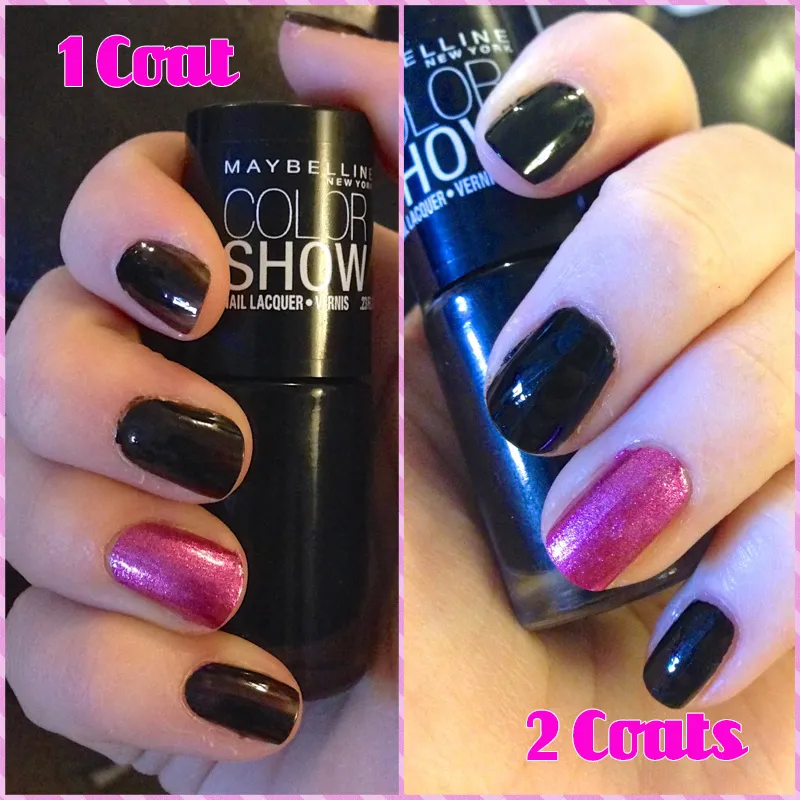
Next up, do one coat of a nice glossy black polish. My favorite is
Maybelline Color Show in Onyx Rush
. After the first coat is
totally dry
, do a second. Let that one dry too!
-
Let all coats
totally 100% dry!
Now it’s time for glitter! Do one coat of pink clear-glitter over the pink nail.
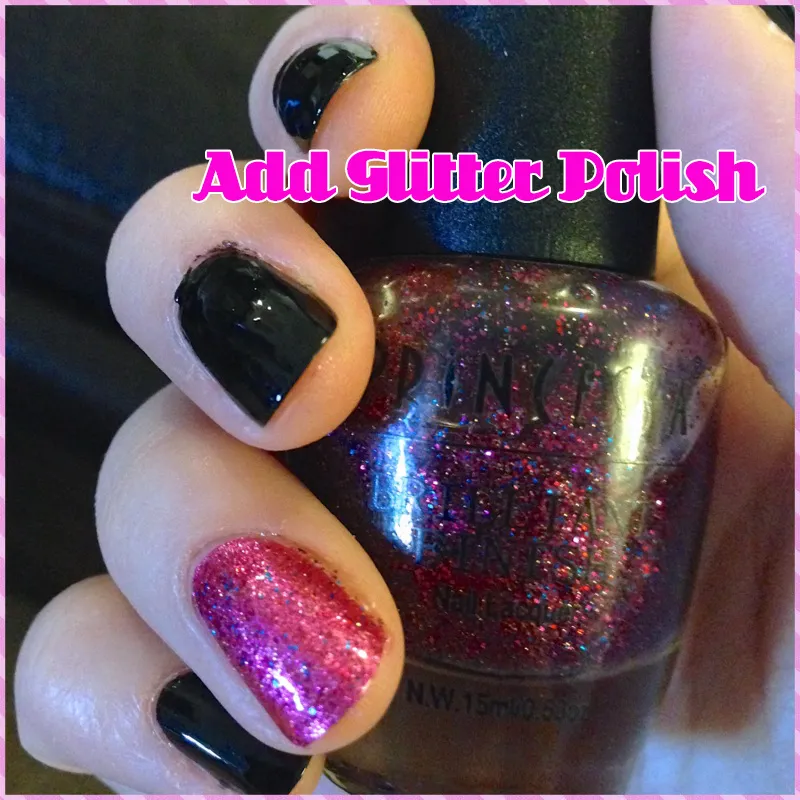
-
Pick two nails you want to also do some pink glitter on, and give it a little ombré look with ‘layers’ of glitter.
-
On the remaining nails, do french tips with the gold glitter polish. Repeat glitter coats for extra sparkle!
- Finish off with a glossy clear top coat. Let dry and you’re ready to party!
I especially loved the black glossy nails with the gold glitter. It looked like I dipped them in gold foil! I will certainly be using this style again. Enjoy your hot pink and black sassy glitter bachelorette party nails!