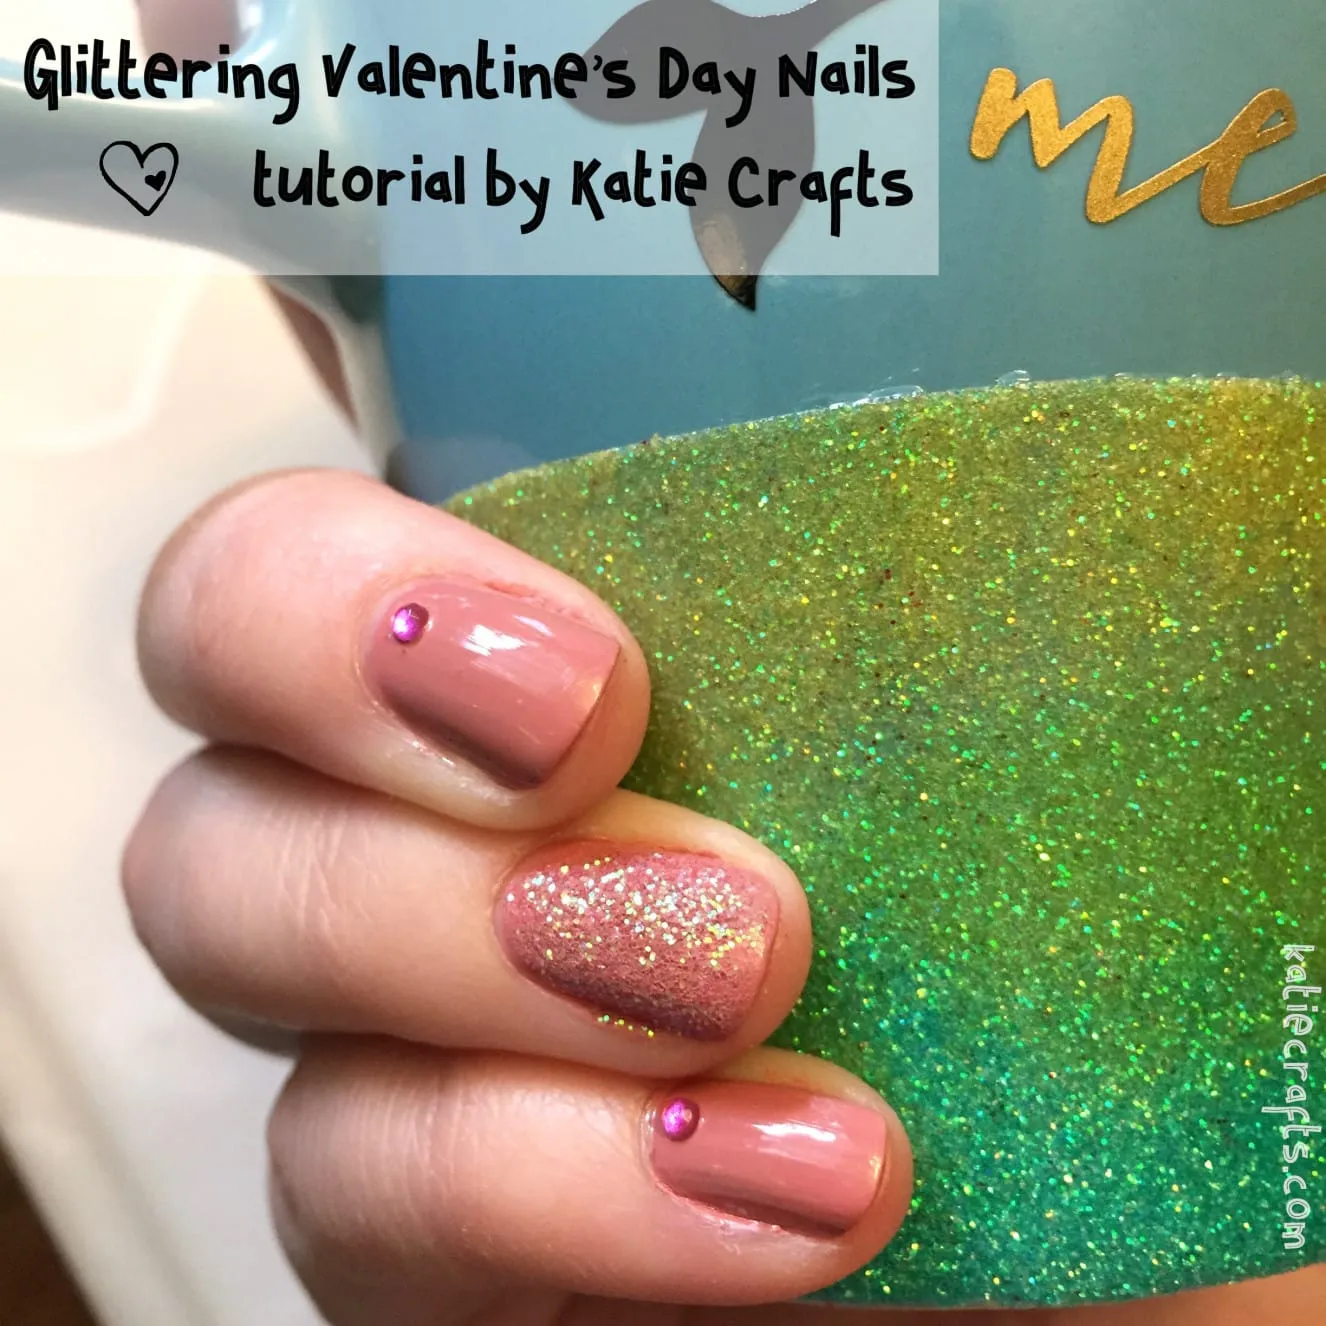
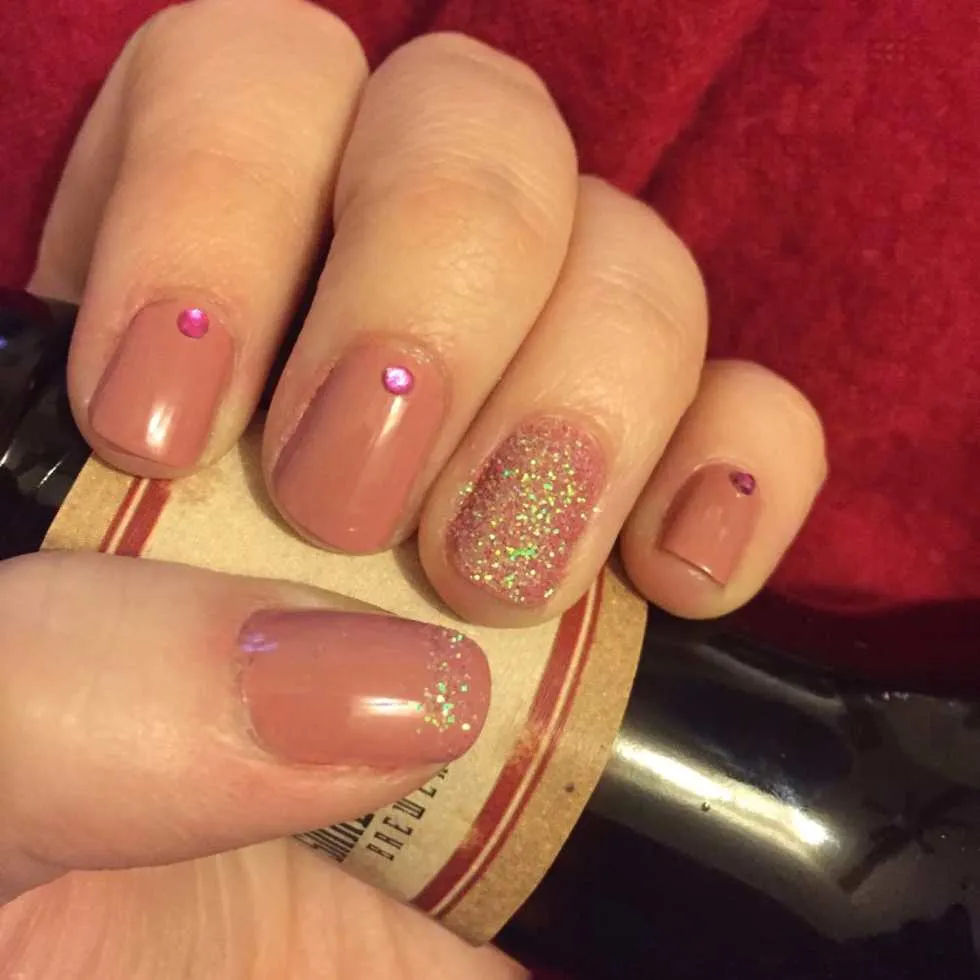
Glittering Valentine’s Day Nails
The
last Valentine’s day nail art look
I shared was a very simple red glitter polish. I went a step further this time and used actual glitter in the design! I was going to make little hearts and stuff, but I decided this look was classier and more versatile. Besides, I can’t say no to glittering Valentine’s Day nails!
Materials:
-
Nude/Pink nail polish
-
Fine iridescent glitter in pink (I used
)
-
Clear nail polish
-
Pink nail gems
Instructions:
- Starting with clean, dry nails, paint one coat of pink polish on every nail. Let dry.
-
Do a second coat of pink on every nail
except
the accent nails (I picked my ring fingers for these). Let dry.
- While the others are drying, paint the accent nails (one at a time) and immediately sprinkle with glitter so that it sticks! Let dry.
- On the the thumbs, using either the clear or the pink polish, paint a thick french tip and immediately cover it in glitter. Let dry.

- When all nails are dry, seal in look with clear top coat, skipping the glitter portions if you like. I skipped the glitter so that it would stay extra sparkly!

-
While the nails are still wet, add a nail gem to the bottom center of each non-accent nail.
-
Enjoy your sweet Valentine’s manicure… and your Valentine’s Day!
Don’t forget to check out Valentine’s nail looks from the past! There are cute ones from
and
!
Which nail art design do you like better for Valentine’s Day- this look or
? How will you be wearing your nails that day?