Crocheted Amigurumi Hippo Pattern
Project: Crocheted Amigurumi Hippo Pattern
A few people in my family and friends circle are currently pregnant! That means come 2015 there will be a few baby showers that I’ll be attending, so I figured I better start making a ton of baby gifts now in preparation! Since we don’t know the sexes of the babies-to-be yet, I’m looking for gender-neutral projects that any little one could play with. In addition to some cute baby blankets (post-to-come!),
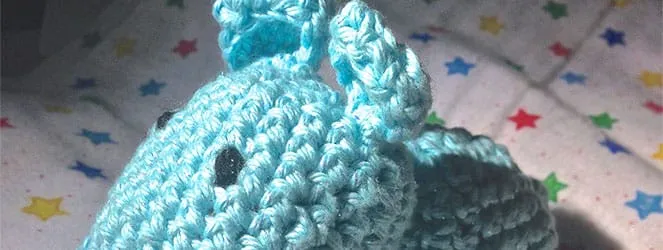
and clothing, I have been busy crocheting little zoo animals at my weekly Crochet/Knit class! The first one I completed was this adorable little hippo!
All credit for this adorable hippo comes from the original pattern at
, where you can find a lot of other great patterns as well! If you are a crocheter, definitely check it out! Copied below is their pattern verbatim, with any changes or notes I had in
*italics & bolded!
Be sure to pop over to
Sweet N Cute Creations
if you want to see more!
Sweet N Cute Creations’ little hippo, Ella, is way cuter than mine! But that’s okay- I like mine too!
Materials:
-
4 ply acrylic yarn in blue and cream [or any color combination you please]
*I used only aqua- the sparkly kind from Hobby Lobby calledI Love This Cotton Yarn
-
safety eyes [10mm]
*I used black yarn for eyes instead
-
crochet hook in G
-
embroidery floss in pink – optional
-
fiberfill stuffing
-
tapestry needle
Pattern Notes
inc [increase] – making 2 sc in one stitch
dec [decrease] – making an sc2tog
all decreases are done invisibly —> decrease through the back loops!
Pattern
HEAD
USING CREAM
*Or in my case, beginning with aqua and continuing through whole pattern!
rnd 1: magic circle, make 5 sc [5]
rnd 2: inc 5 times [10]
rnd 3: inc in next st, sc in each of the next 3 st, inc 2 times, sc in each of the next 3 st, inc in last st [14]
rnd 4: sc in next st, inc in st after. sc in each of the next 3 st; [sc in next st, inc in st after] twice; sc in each of the next 3 st; inc in last st [18]
rnd 5: [sc in next st, inc in st after] 9 times [27]
rnd 6-8: Sc all around
rnd 9: [sc in each of the next 7 st, dec] 3 times [24]
SWITCH TO BLUE
*or simply continue if you are using just one color!
rnd 10-11: sc all around [24]
safety eyes to be inserted here. make sure they are 6 st apart [or as far or near as you would like]
*If you aren’t adding safety eyes now, skip this step and simply stitch on with black yarn at very end.

rnd 12: [sc in each of the next 6 st, dec] 3 times [21]
rnd 13-14: sc all around [21]
rnd 15: [sc in each of the next 5 st, dec] 3 times [18]
rnd 16: [sc in each of the next 4 st, dec] 3 times [15]
start stuffing HERE
rnd 17: [sc in each of the next 3 st, dec] 3 times [12]
rnd 18: [sc in each of the next 2 st, dec] 3 times [9]
fasten off leaving a long tail for weaving in the ends
EARS
USING BLUE
rnd 1: magic circle, make 5 sc [5]
rnd 2: inc 5 times [10]
rnd 3: sc in each of the next 2 st, hdc in each of the next 2 st, dc in each of the succeeding 2 st, hdc in each of the next 2 st, sc in each of the remaining 2 st [10]
fasten off leaving a long tail for sewing
BODY
USING BLUE
rnd 1: magic circle; make 6 sc [6]
rnd 2: inc 6 times [12]
rnd 3: [sc in next st, inc in st after] 6 times [18]
rnd 4: [sc in each of the next 2 st, inc in st after] 6 times [24]
rnd 5: [sc in each of the next 3 st, inc in st after] 6 times [30]
rnd 6: sc all around [30]
rnd 7: [sc in each of the next 3 st, dec] 6 times [24]
rnd 8: sc all around [24]
rnd 9: [sc in each of the next 4 st, dec] 4 times [20]
rnd 10-12: sc all around [20]
rnd 13: [sc in each of the next 3 st, dec] 4 times [16]
rnd 14: hdc in each of the next 6 st; sc in each of the succeeding 3 st, hdc again in each of the remaining 7 st [16]
rnd 15: sc in each of the next 6 st; slst in each of the succeeding 3 st, sc again in each of the remaining 7 st [16]
rnd 16: sc in each of the net 2 st, dec. sl st in each of the next 8 st. THROUGH BLO hdc in each of the remaining 4 st [16]
rnd 17: hdc in each of the next 2 st. sl st in next [3] do not mind if it doesn’t finish the entire row.
fasten off leaving a long tail for sewing
FRONT LEGS
USING BLUE
rnd 1: magic circle; make 4 sc [4]
rnd 2: [sc in next st, inc in st after] 2 times [6]
rnd 3-5: sc all around [6]
fasten off leaving a long tail for sewing
HIND LEGS
USING BLUE
rnd 1: magic circle; make 4 sc [4]
rnd 2: inc 4 times [8]
rnd 3-5: sc all around [8]
fasten off leaving a long tail for sewing
TAIL
ch 7, hdc in 3rd ch from hook. sl st in each of the next 4 st.
flip to the other side
sl st in each of the next 4 st. hdc in last st.
fasten off leaving a long tail for sewing
Assembly
-
Fully stuff the head and weave all ends together to close the small opening.
-
attach the ears to the head using safety pins
*I did not have pins at class with me, so I just used my yarn needle and stitched everything on without using pins.
Once you’re happy with how it looks; sew it to the head. to properly secure it, i suggest drawing the yarn out through the middle part of the back of the head. this is because the body will cover that part
-
stuff both hind and front legs; and the body
-
attach the legs to the body.
the front legs are placed diagonal to the hind because the body becomes smaller as it goes towards the body
-
sew on all the legs to the body. in sewing, you may opt to remove the stuffing in the body to give you an easier time to sew
-
after sewing the legs, sew on the tail to the body as well
-
fully stuff the body now
-
take note of the diagonal of the body. the diagonal is where the head will rest
-
Once you’ve pinned the head onto the diagonal of the body, you can now sew it in place
-
once you’re done sewing it in place, your hippo is all ready to go!!!!
__
*After everything was sewn together, I added the eyes with black yarn and a few stitches, and some little nostril nubs like hippos have to give the face a little dimension!
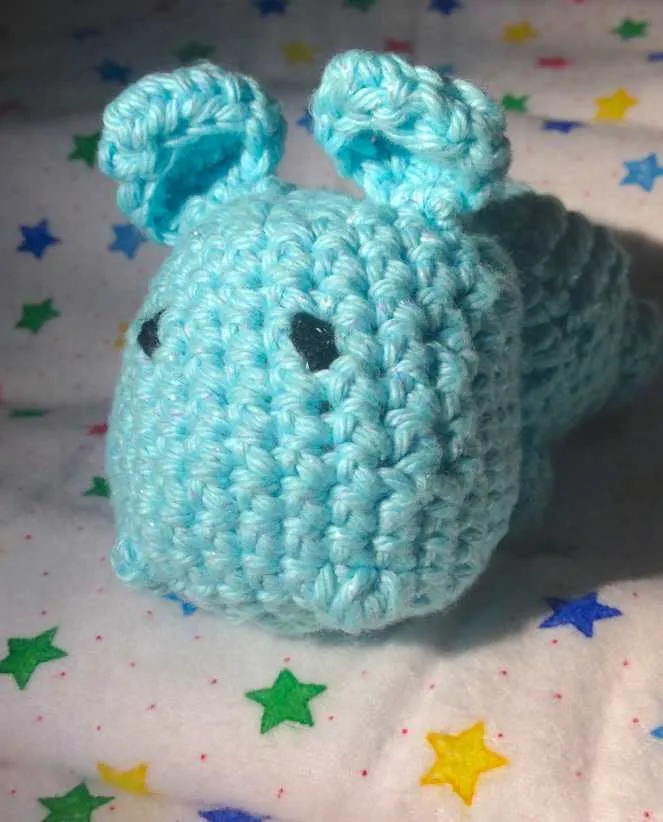
Isn’t Sweet N Cute Creations little hippo pattern just awesome!? How did mine come out?
![]()