Mom’s Chicken Cutlets
Recipe: Mom’s Chicken Cutlets
One of the earliest things I remember helping my mom cook was her chicken cutlets. She’d lay out three bowls (one for flour, one for eggs, and one for breadcrumbs) and let me dip the chicken in to each, carefully coating it on each side. It made my fingers disgusting, but I loved every minute of it. Especially because I knew it meant very soon I’d get to eat my mother’s amazing chicken cutlets.
Many years later, the recipe is still the same, with a very slight tweak from my father (whose birthday is today!!) My Husband (who also celebrates a birthday this month) had a hankering for chicken cutlets, mashed potatoes and honey glazed carrots, so I thought I’d share a few of the recipes with you. Today will be “Mom’s Chicken Cutlets” day, and later in the week will be “Dad’s Honey Glazed Carrots” day! I’ve always preferred these chicken cutlets to anything in a store or restaurant because they just taste SO MUCH BETTER! Hope you try out the recipe and fall in love too!
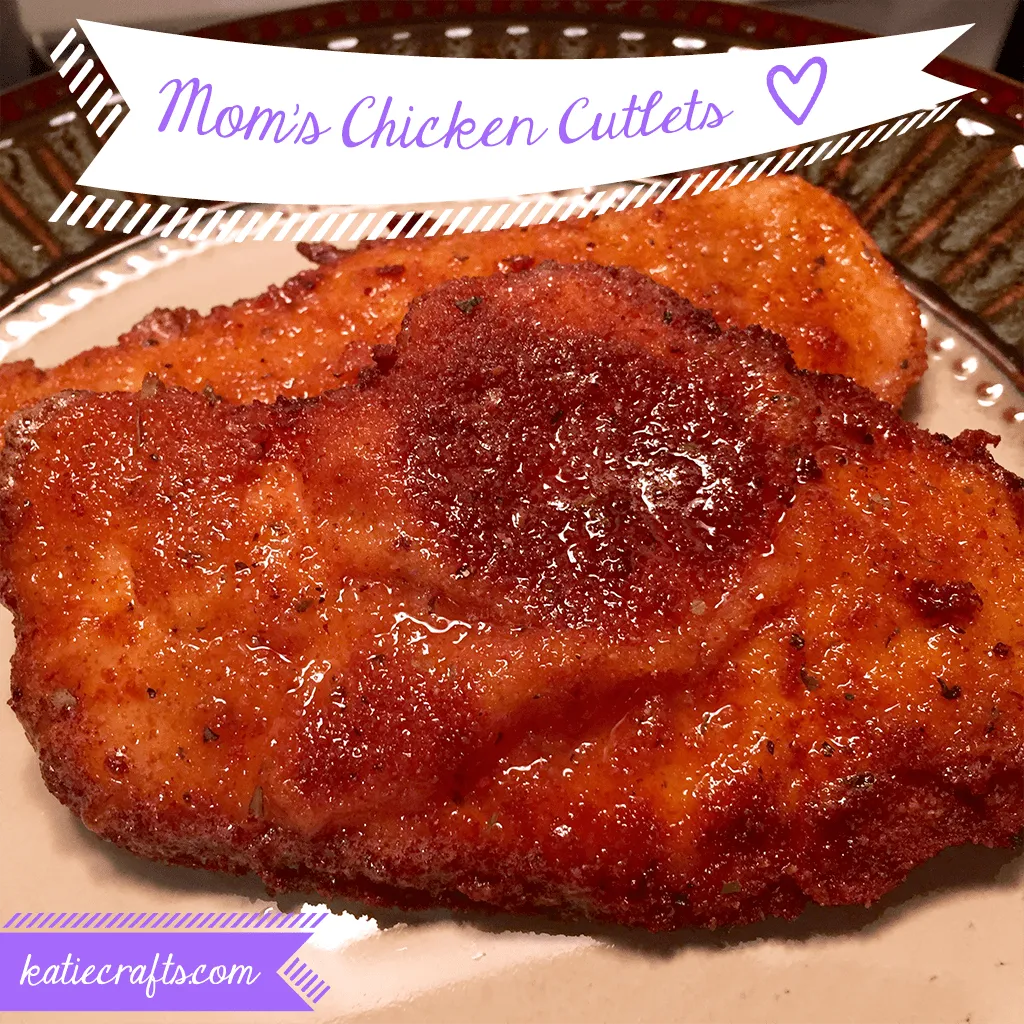
That’s not greasy oil, that’s delicious honey! Mmm!
The amount for each ingredient will depend on how much you are cooking, so I didn’t include specific amounts below. If you are cooking 4-6 cutlets (a typical package of chicken breasts), you will need about 3/4 cup of flour, 1 to 1 1/2 cups of breadcrumbs and two eggs. I always start with the minimum and add extra as I go if needed, so I’m not wasteful!
Ingredients:
-
Boneless, trimmed, thin cut chicken breasts
-
Italian seasoned breadcrumbs
-
Flour (all-purpose white or wheat)
-
Eggs (2+… see above)
-
Olive oil (enough to generously cover the entire bottom of your frying pan)
-
Honey
-
Salt, pepper, onion powder, garlic powder, paprika
Instructions:
-
If your chicken breasts aren’t trimmed of fat, etc. yet, do so before you get started!
-
Pound cutlets with a tenderizer. If they are VERY thin cut, only do this a little. You aren’t looking for a chicken pancake!
-
Season each side of each breast with salt, pepper, onion powder, garlic powder and paprika (just a sprinkle of each, to taste).
-
Line up three bowls, and place the flour, eggs (remember to scramble them!), and breadcrumbs in them, respectively.
Tip: Remember “F-E-B-ruary”: F(lour)-E(ggs)-B(readcrumbs)
-
Add olive oil to your pan, enough to cover the entire bottom of the pan and then some. Maybe about half an inch of oil deep. Turn on low heat and let it start warming up.
-
With CLEAN HANDS (take your wedding rings off, first!), and a fork or tongs, completely coat each side of the chicken breast in the flour, then eggs, then breadcrumbs. Be sure to gently shake off excess flour/breadcrumbs when on those steps.
-
Set chicken aside on a plate. Repeat for each breast.
-
Turn pan to medium-high (being careful!) to let it finish heating up while you clean up the mess you just made with the flour.
-
Test hotness of pan by flicking a drop or two of water in to it. If it sizzles, it’s ready for the chicken.
-
Place the chicken breasts in the pan and let cook approximately four minutes on one side (or until you see at least halfway up the side of the breast is browned).
-
Flip over to cook other side of breast until the whole cutlet is almost as golden brown as you like.
-
Add a squirt of honey to the top of the breast and let cook the last minute with the honey on top. You will only be adding honey to this one side, because the honey and oil do not get along. Trust me.
-
Transfer to a clean plate that is covered in paper towels, to soak up the oil. Make sure you place the breast honey-side-up, so it doesn’t stick to the paper!
-
Repeat for all breasts, cooking a few at a time. Feel free to use your tongs to occasionally lift up the chicken and check for doneness on other side. Add oil to the pan if necessary, but remember to let it catch back up to the correct heat before adding more chicken.
If you ever end up with soggy chicken cutlets, it is because your oil was not hot enough!
-
Let chicken cool on the paper towels until ready to eat. It’s delicious hot with mashed potatoes and carrots, cold the next day on a sandwich, or with cheese for chicken parm! YUM!
Don’t these carrots look wonderful? Recipe coming soon!
If you try this recipe, let me know how it goes in the comments! What is your favorite side dish for chicken cutlets?